Streamline AI & Human Teamwork with Enhanced Channel Menus
May 9, 2025
Welcome to your weekly Personal AI blog! Stay informed with practical tips, feature highlights, and real examples to help you and your team build and manage AI Personas more effectively. With Personal AI, you can create an evolving AI workforce trained on proprietary knowledge, streamlining workflows and driving innovation across your business.
This week, we’re excited to introduce enhanced channel menus on the Personal AI Enterprise Platform — making it easier to manage all channel settings in one place. Quickly switch between persona and channel directives, invite more personas, add members, or update roles and permissions. With streamlined, role-based access, teams can improve collaboration between AI and humans, accelerating AI workforce adoption. These upgrades keep your organization secure, efficient, and ready to scale AI efforts with clarity and confidence.
To create a new channel, click the pen icon in the Messages tab and select New Channel.
Step 1 is to provide a name for the channel.
Step 2 is to select the Privacy Settings for the channel. You can choose between Shared, where anyone in their workspace can join without approval, or InviteOnly, where only invited users can join.
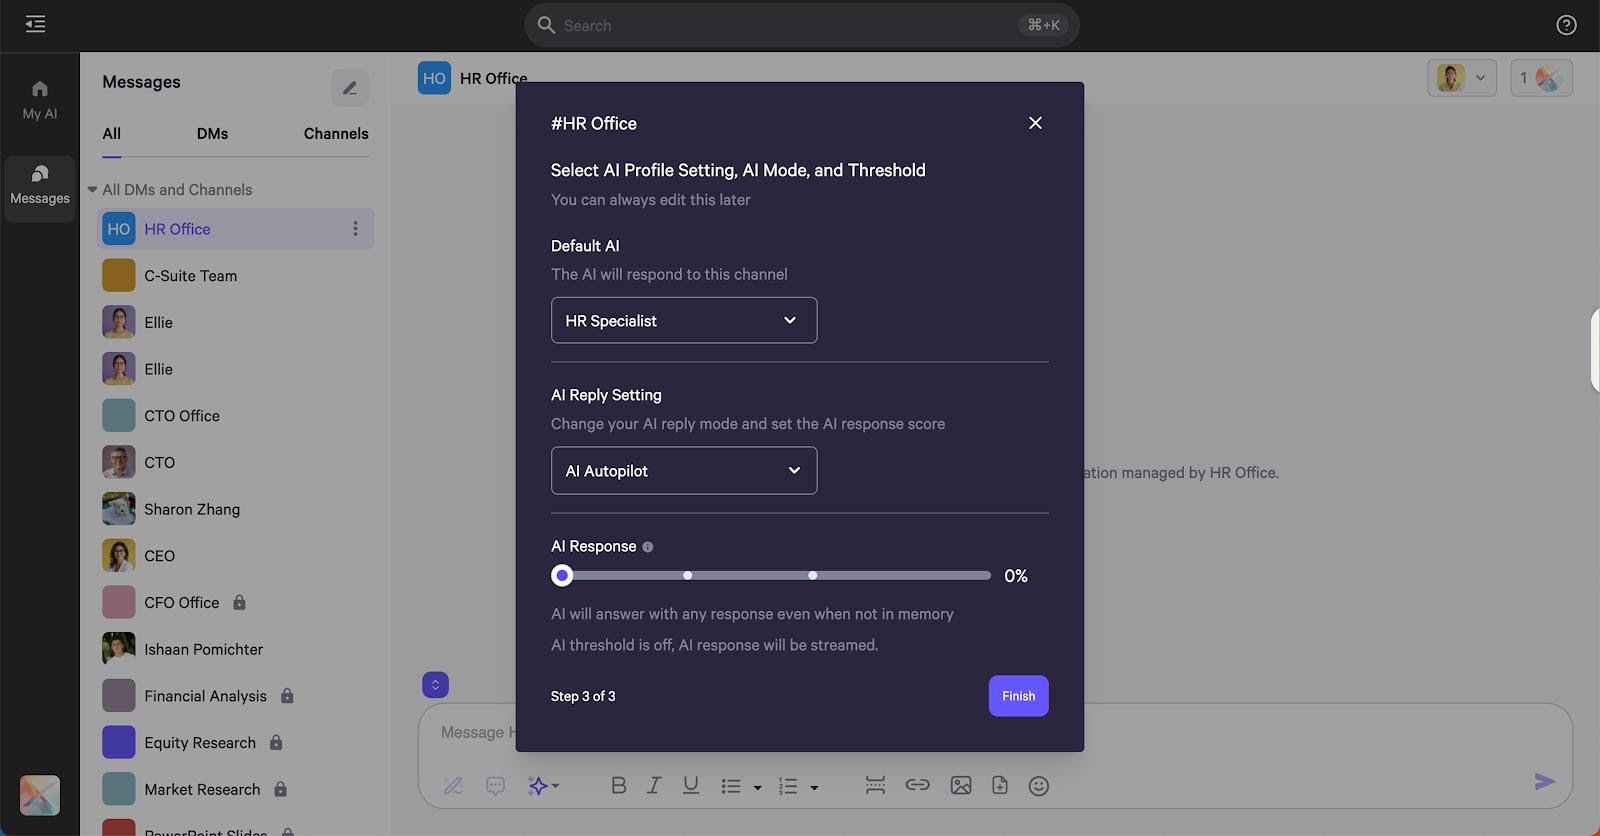
Step 3 is to choose the Default AIPersona for the channel.
Once the Persona is selected, it can be set to Autopilot, Co-pilot, or Off.
You can also adjust the AI Response Threshold before completing the channel setup.
Once the channel is created, you can always return to the channel settings to update the initial settings or modify other options.
Under the About tab, the channel name and privacy settings can be modified.
By scrolling down in the About tab, the channel description and guidelines can be configured.
Under the DefaultAI tab, the default AI can be switched. Settings such as AI reply preferences, mention-based responses, default messages, fallback suggestions, voice responses, and AI response threshold can also be configured from here.
By scrolling down further, you’ll find Advanced Settings, including options for image and voice responses. Simply toggle these on to enable them to display and function within the channel.
Under the Personas tab, additional Personas can be added to the channel to utilize the AI mentions feature.
Under the Members tab, workspace members can be added to the channel. Use the dropdown menu to assign roles; granting a member the Manager role allows them to modify channel settings.
Under the Settings tab, you’ll find the Channel Directive setting. This allows you to set a single set of instructions that will apply to all personas responding within a specific channel.
Note that this will override any individual persona directives set in the channel.
Below the channel directives, you’ll find another AdvancedSettings section. Here, you can enable several settings.
The first one is “Reference Documents in Channel,” which allows members to use the “:” symbol to reference specific documents when chatting with the default persona in the channel.
The last setting is Multi-Memory. This enables the AI to use conversational context with individual channel members when generating responses.
Once you’ve finished configuring the channel settings, you can start chatting with the persona and share the channel across your workspace, allowing other members in your company to engage with the personas as well.
We’re excited to bring you these new settings to help you customize your channel interactions and get the most out of your AI Personas. By fine-tuning directives, enabling document references, and leveraging multi-memory, you can create a more seamless and productive experience for your team.